How to Reload your OS using a Virtual CD-ROM over IPMI
IPMI 2.0 comes standard on our newest line of Intel Xeon E3 and E5 servers. Among IPMI's many useful features is the ability to mount an ISO from a Windows share as a Virtual CD-ROM. Before following the steps in this guide, be sure you have the ISO for your new OS of choice available over a Windows share.
[1] Login to your IPMI portal using the information you were given upon your server's turnup.
[2] Navigate to Virtual Media -> CD-ROM Image

[3] Enter the information for accessing the ISO on your Windows share.
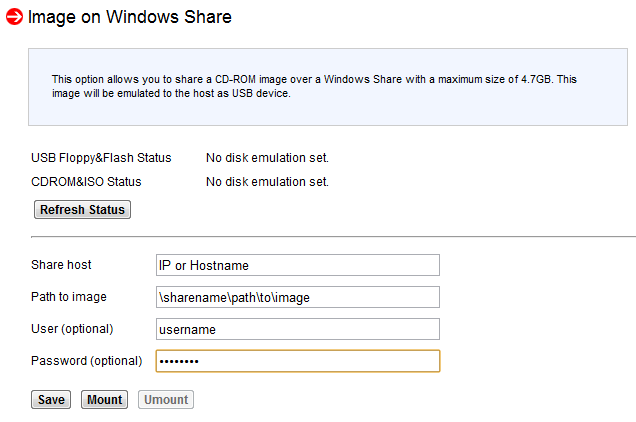
Share host: Enter the IP address or properly resolving hostname of the server where your ISO resides
Path to image: Enter the path to your ISO. This path is of the form:
\sharename\path\to\image
The beginning of the value is the name of your Windows share and then the path to the ISO within that share.
User (optional): if your Windows share requires a username and password for access, enter the username here.
Password (optional): if your Windows share requires a username and password for access, enter the password here.
[4] Once you've entered the necessary values, click ![]() You should see the following message if your settings were entered correctly:
You should see the following message if your settings were entered correctly:

[5] After saving your configuration, you now need to mount the Virtual CD-ROM. Click ![]() to mount the share. You should immediately see the CDROM and ISO Status change to "There is a disk mounted" as displayed here:
to mount the share. You should immediately see the CDROM and ISO Status change to "There is a disk mounted" as displayed here:

Additionally, the Mount button will grey out. If you do not see "There is a disk mounted" under the CDROM and ISO Status section, please repeat step 3) and ensure your Windows share is accessible.
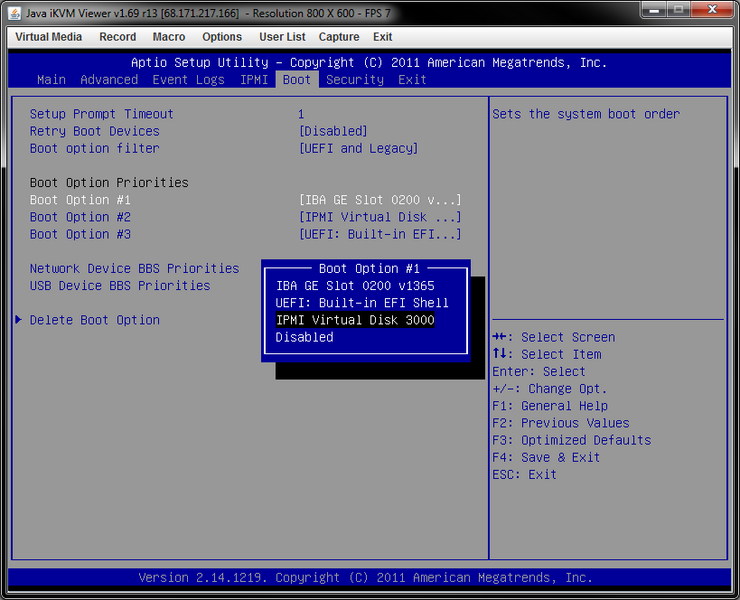
[6] With your CD-ROM image mounted, we can now reboot the machine and boot from the image. Go back to the "System Information" page:

[7] On the "System Information" page, select click on the IPMI remote console preview section to open up the Java application for accessing your server's console.
[8] Once the Java application is loaded, select Macro -> Macro -> Ctrl Alt Del. This will issue a soft reboot command to your server so that you can boot into BIOS.

[9] Your server should be rebooting now. Be sure to keep an eye out for the following screen. You'll need to catch your server while it's booting up and press the Delete key at the appropriate time to boot into BIOS. If you miss your window, simply reboot your server and try again.
You should be looking for this screen:

[10] You should now see your server's BIOS. Navigate to the "Boot" tab and select "Boot Option #1". Under the "Boot Option #1" settings, select the Virtual Disk you've mounted. It is listed as "IPMI Virtual Disk 3000".
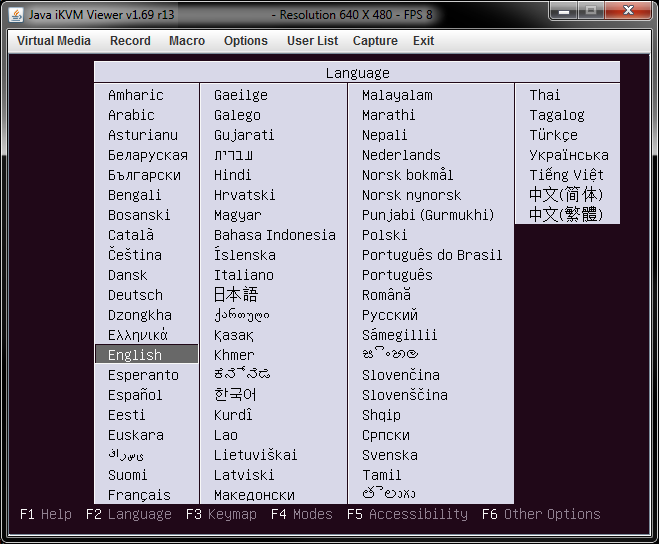
[11] Navigate to the Exit tab and save your changes. Your server will reboot into the Virtual CD-ROM image and you can begin loading your Operating System from the Java Remote Console viewer. Here's a screenshot of a server booted into an Ubuntu ISO:
[12] Once your operating system is finished being loaded, navigate to the Virtual Media -> CD-ROM Image page again. We'll want to unmount the ISO. Click on the ![]() button to unmount the ISO.
button to unmount the ISO.