Difference between revisions of "Create User SSH Key"
Docs admin (Talk | contribs) |
Docs admin (Talk | contribs) |
||
| Line 42: | Line 42: | ||
[[File:cpsshkey7.png]] | [[File:cpsshkey7.png]] | ||
| − | 10) Under Public Keys, click on View/Download to the right of the key name. | + | 10) Under Public Keys, click on View/Download to the right of the key name. |
[[File:cpsshkey8.png]] | [[File:cpsshkey8.png]] | ||
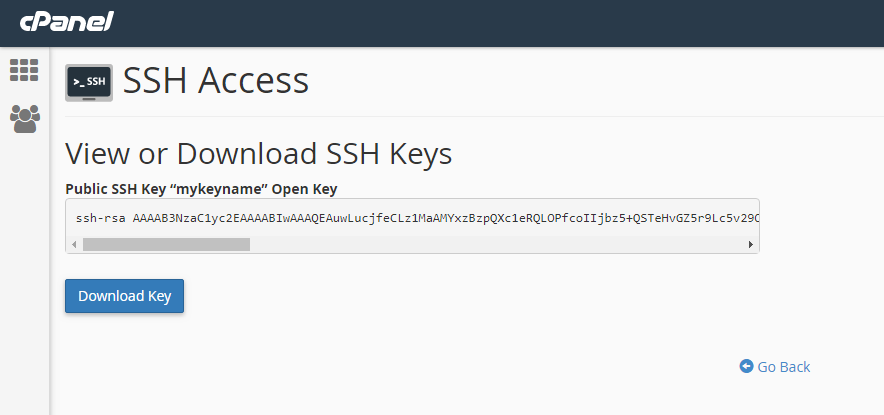
| − | 11) | + | 11) Click on the blue "Download Key" button and save it to your local machine. Click the Go Back link at the bottom of the page. |
| + | |||
| + | [[File:cpsshkey9.png]] | ||
| + | |||
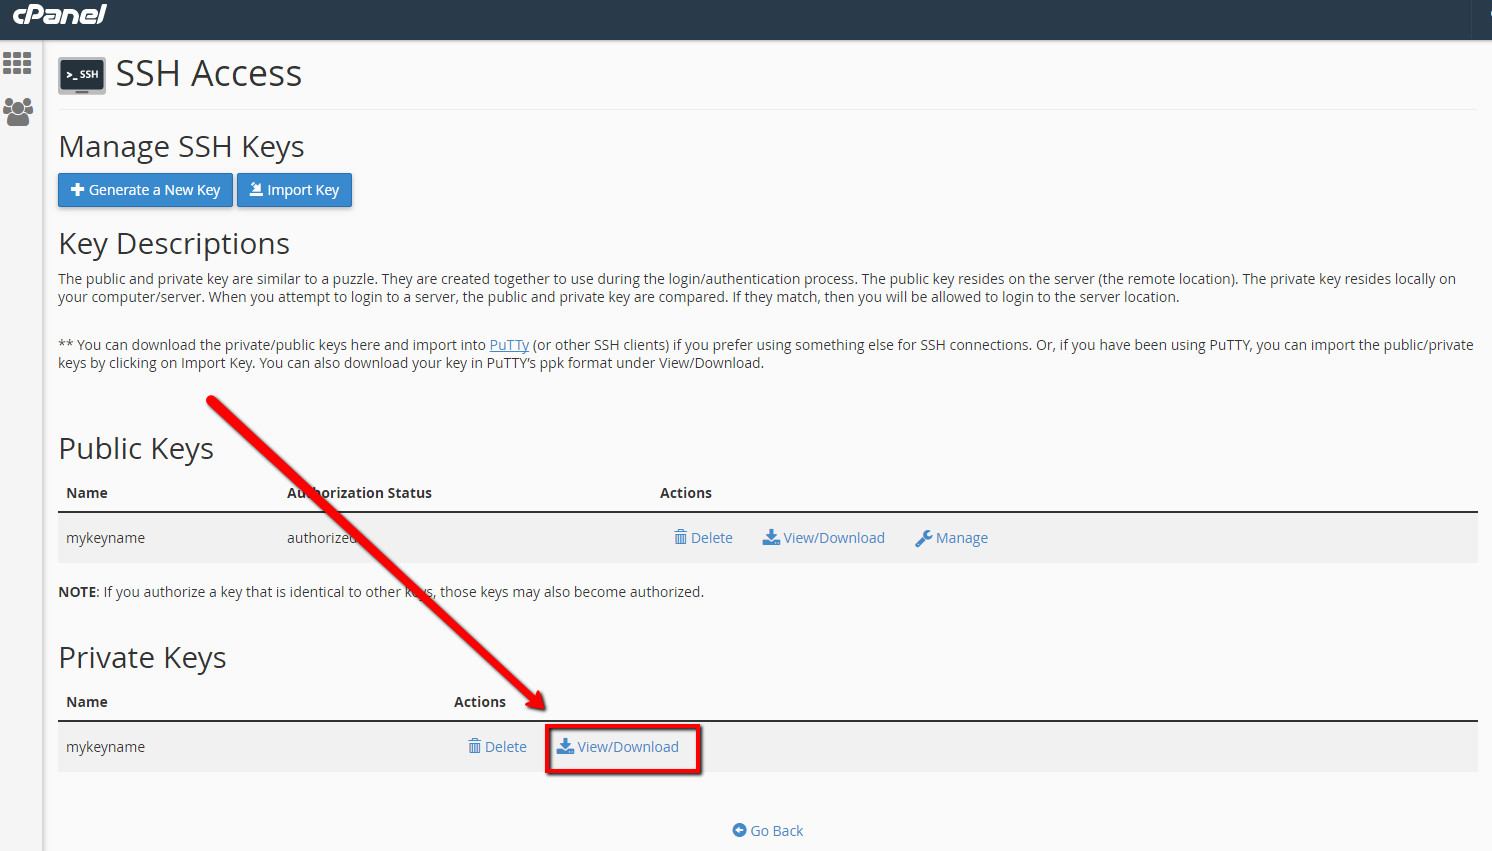
| + | 12) Under Private Keys, click on View/Download to the right of the key name. | ||
| + | |||
| + | [[File:cpsshkey10.png]] | ||
| + | |||
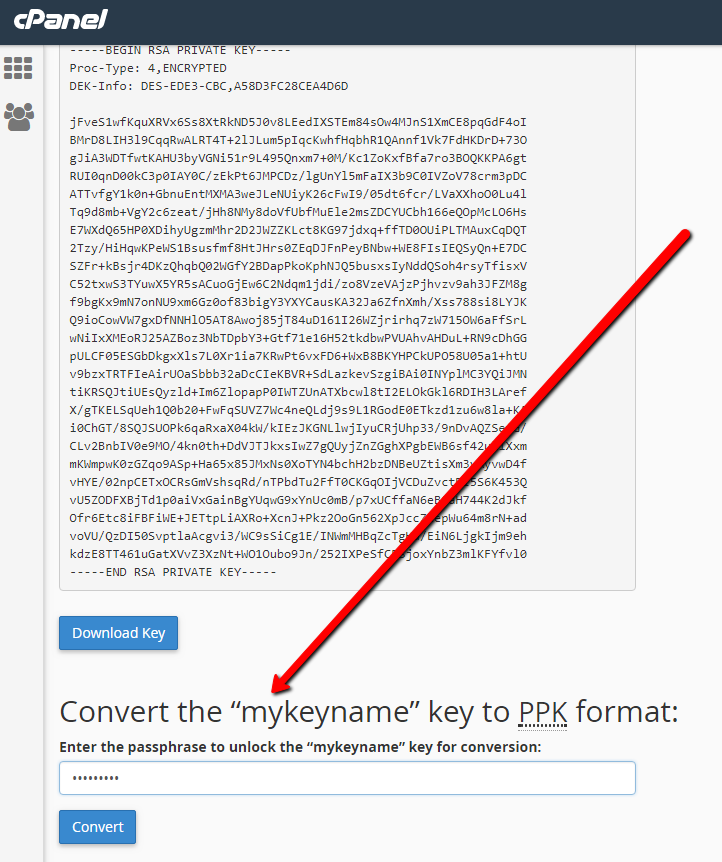
| + | 13) Scroll down, and under Convert the KEYNAME key to PPK format section (showing your key name), enter the passphrase and click Convert to create the PPK file. | ||
| + | |||
| + | [[File:cpsshkey11.png]] | ||
| + | |||
| + | 14) | ||
| + | |||
| + | 15) | ||
Revision as of 15:17, 13 February 2018
SSH keys provide a more secure way of logging into a server with SSH than using a password alone. While a password can eventually be cracked with a brute force attack, SSH keys are nearly impossible to decipher by brute force alone.
Generating an SSH key pair provides you with two long string of characters: a public and a private key. You can place the public key on any server, and then unlock it by connecting to it with a client that already has the private key. When the two match up, the system unlocks without the need for a password.
You can increase security even more by adding a password when you generate the SSH key pair. A password is not required, but adds an additional level of security. Even if by some remote chance someone were to get your private key, they would need to know your password in order to use it.
Creating a User SSH Key
1) Login to your cPanel
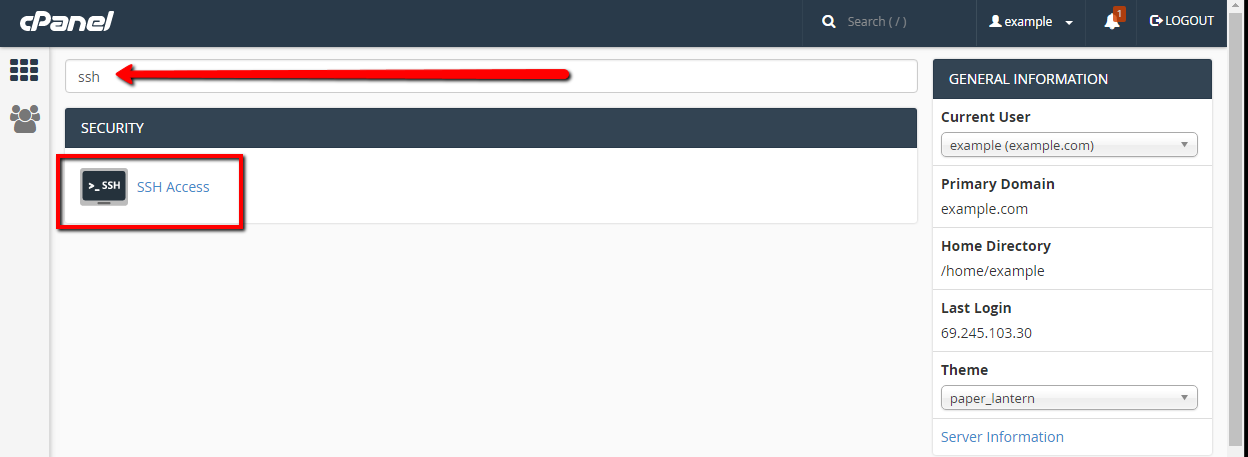
2) in the Find box at the top of the page, enter "SSH"
3) Click on the SSH Access icon
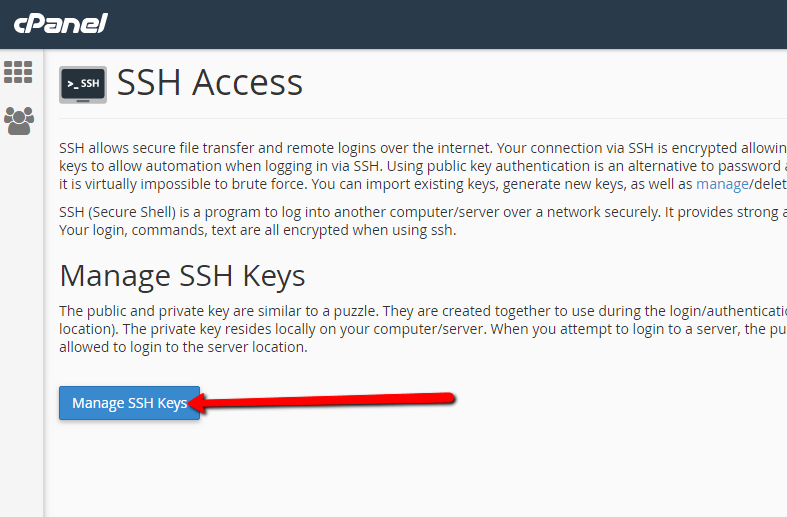
4) Click on the blue Manage SSH Keys button
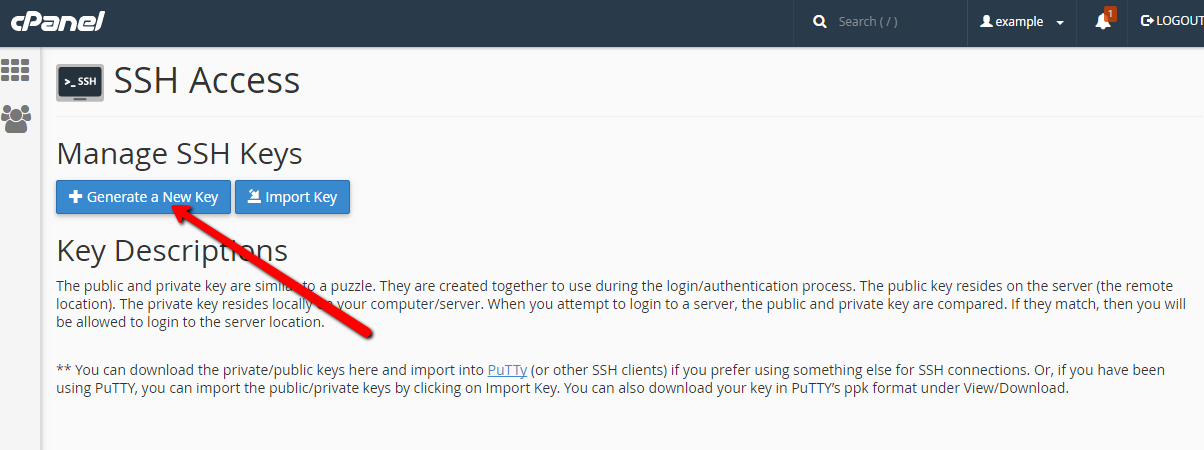
5) At the top of the next page, Click the blue "Generate a New Key" button
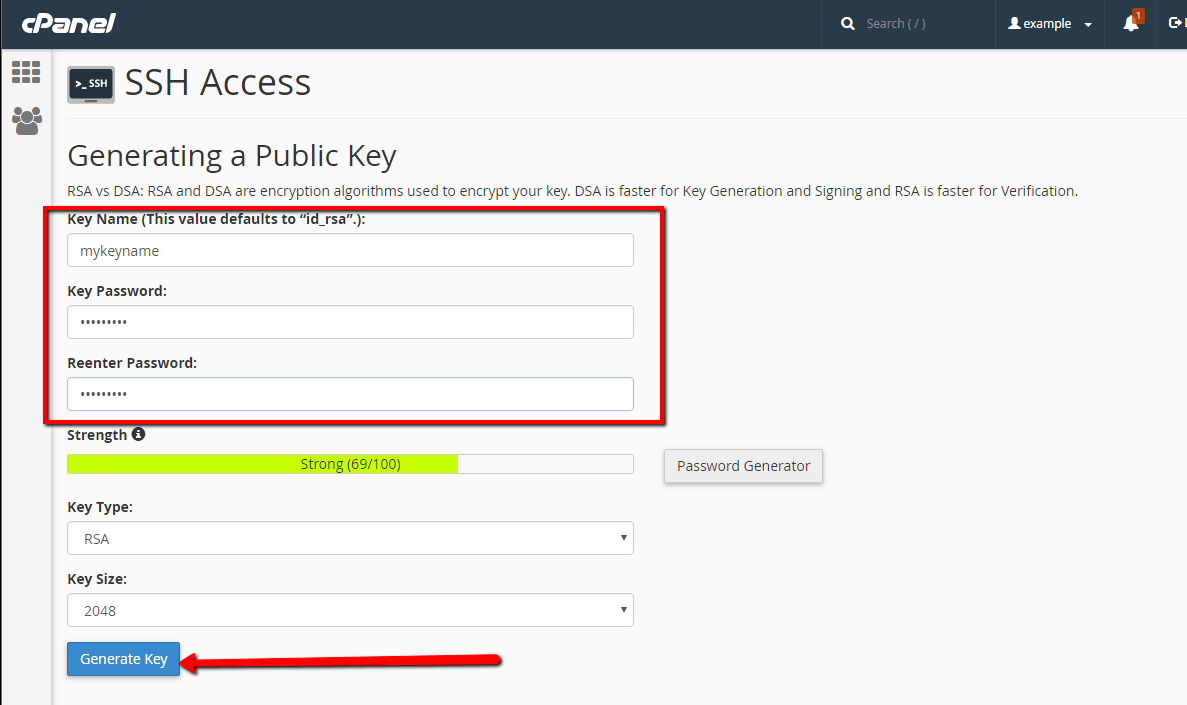
6) On the next page, enter an easily remembered name, and a key password. Click the blue "Generate Key" button.
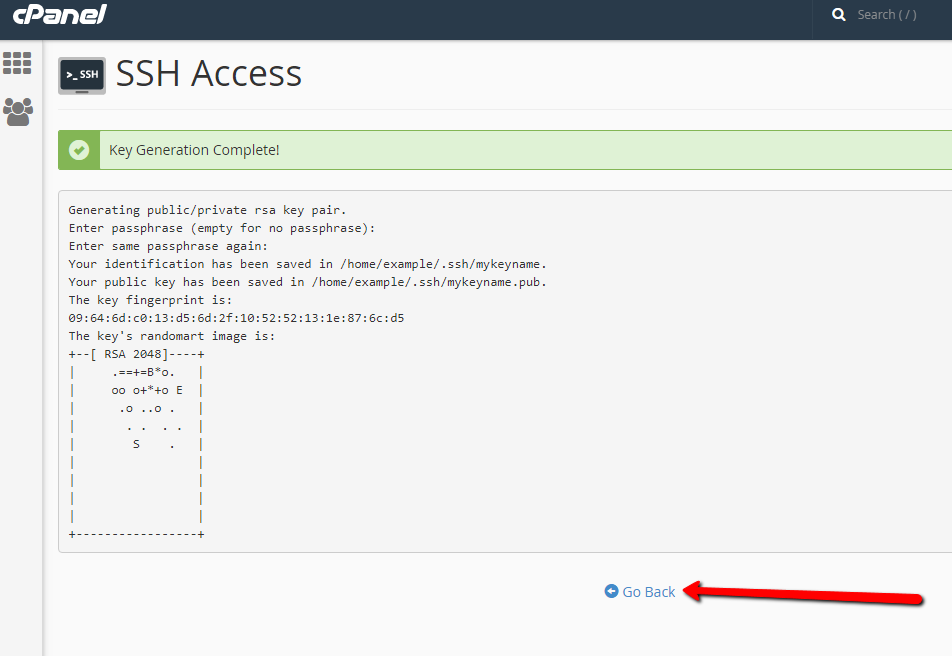
7) On the next page, click the Go Back link at the bottom. You will be directed back to the Manage SSH Keys screen,
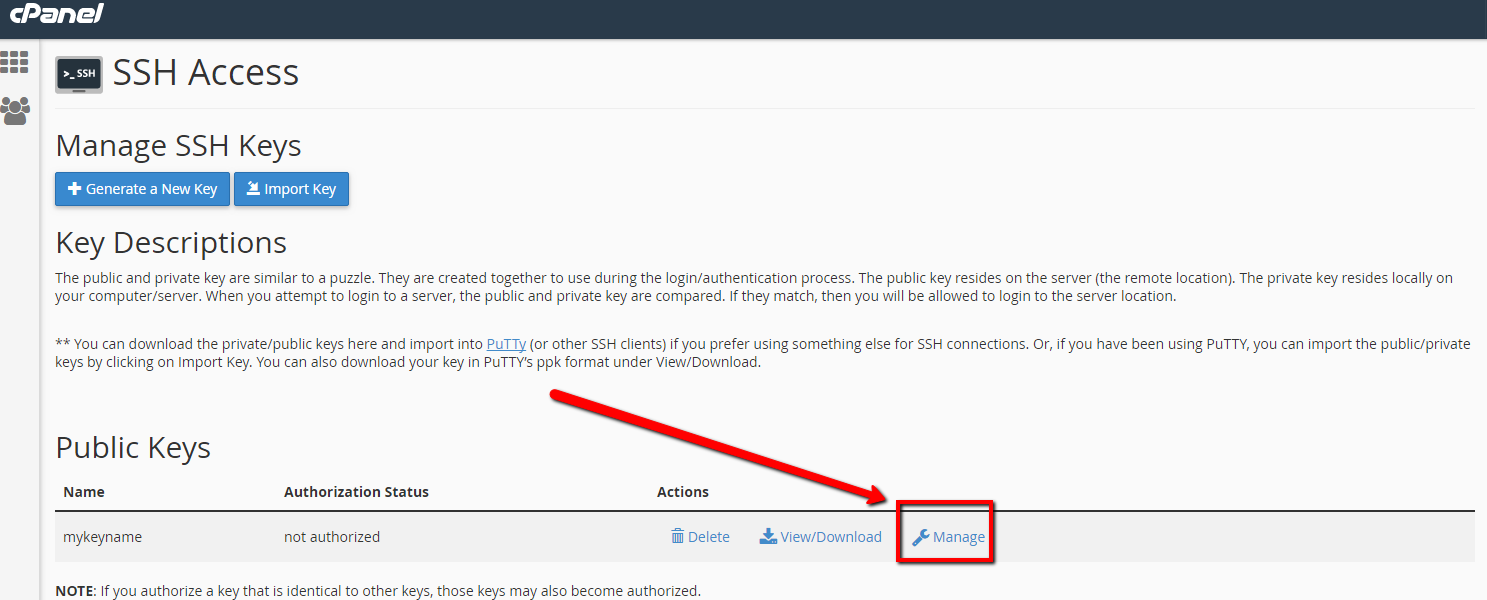
8) Under Public Keys, find the key you just created and click on the Manage Icon.
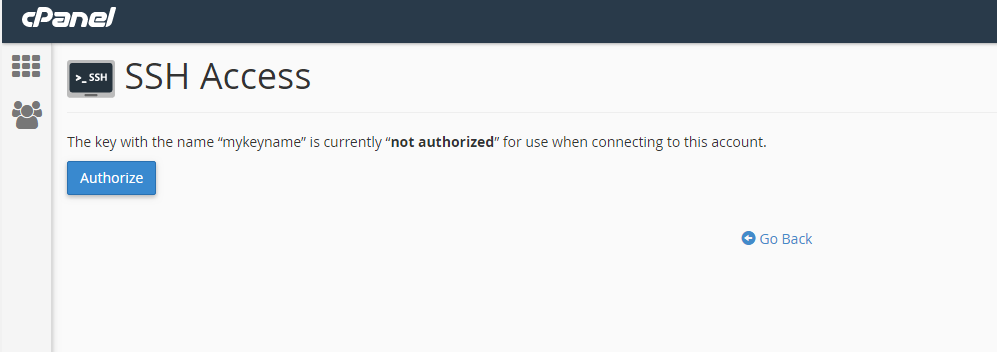
9) On the next page, click the blue "Authorize" button to allow it to be used to connect to the server. Click the Go Back link at the bottom of the page
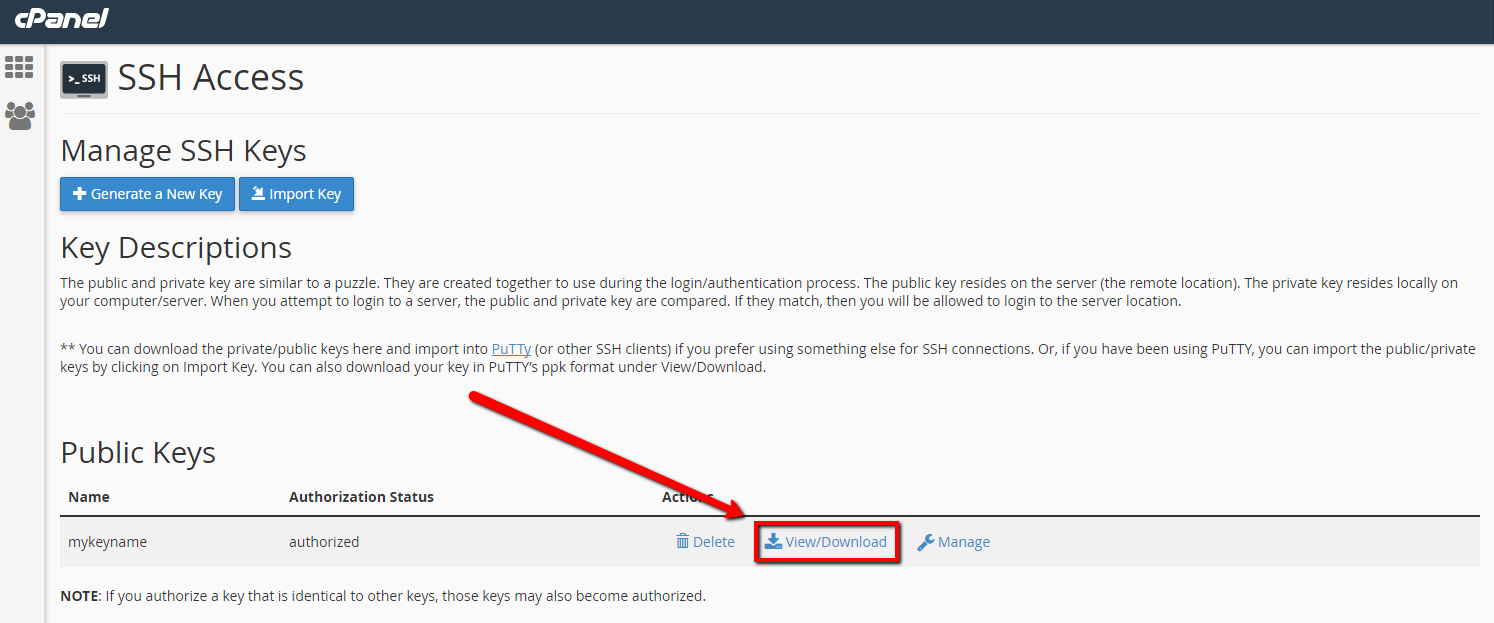
10) Under Public Keys, click on View/Download to the right of the key name.
11) Click on the blue "Download Key" button and save it to your local machine. Click the Go Back link at the bottom of the page.
12) Under Private Keys, click on View/Download to the right of the key name.
13) Scroll down, and under Convert the KEYNAME key to PPK format section (showing your key name), enter the passphrase and click Convert to create the PPK file.
14)
15)
