Wordpress: Difference between revisions
Docs admin (talk | contribs) No edit summary |
Docs admin (talk | contribs) No edit summary |
||
| Line 9: | Line 9: | ||
<u>Step 1</u> Log into your cPanel | <u>Step 1</u> Log into your cPanel | ||
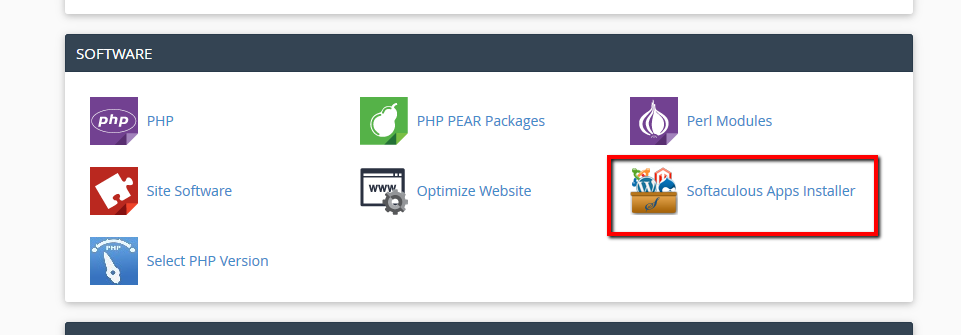
<u>Step 2</u> Scroll down to the Software area, and Select the Softaculous Apps Installer icon. | <u>Step 2</u> Scroll down to the Software area, and Select the Softaculous Apps Installer icon. | ||
[[File:Wp_install1.png]] | [[File:Wp_install1.png]] | ||
<u>Step 3</u> On the next page, you will see Wordpress at the top of the Top scripts list. Mouse over the Wordpress icon, and click Install. | <u>Step 3</u> On the next page, you will see Wordpress at the top of the Top scripts list. Mouse over the Wordpress icon, and click Install. | ||
Revision as of 12:58, 14 January 2016
Wordpress is the easiest and most popular website content management system (CMS) available. Many famous websites are managed with Wordpress: Mashable, TechCrunch, The New York Times' blogs, and CNN's on-air personality blogs.
If you’re ever curious about who uses WordPress, head on over to the WordPress site showcase and you’ll be impressed by the number of well-known sites and famous people using WordPress to power their websites.
If you are on an Acenet shared account, you can install Wordpress through Softaculous in cPanel.
Step 1 Log into your cPanel
Step 2 Scroll down to the Software area, and Select the Softaculous Apps Installer icon.
Step 3 On the next page, you will see Wordpress at the top of the Top scripts list. Mouse over the Wordpress icon, and click Install.
Step 4 There are several installation options on the next page that can be edited as needed.
Choose Domain -- If you have an addon or sub domain configured, you can select that domain here to install WP in that domain.
In directory -- Enter a subdirectory name here to install in that directory, or delete the entry there to install just on the domain root.
Site Name and Site Description -- Appears in the browser Tab and within search engines. Automatically configures the necessary meta-tags.
Admin Username, Password, and Email -- For security reasons, please change the admin username and password to something other than admin. This will help deter most automated hacking tools.
Advanced Options - Auto Upgrade -- We recommend enabling all three Auto upgrade options. This will help keep your Wordpress website protected from vulnerabilities as soon as the update is released.
Select Theme -- There are several free themes that are available to be installed via Wordpress. Select any of the free themes listed to install instead of the default theme.
When done, click Install.
Step 5 Softaculous will check the submitted data and install the Wordpress Software and database to your account. Click return to overview. You should then see the installation under Current Installations.
You can now visit your website, and login to the admin panel to start creating your website. There are many tutorials available on the internet, but the definitive guide is the First Steps guide available from Wordpress.org.
How do I get Started using Wordpress -- Cloud/Dedicated server
If you are on a Cloud or Dedicated server, Softaculous is available to be installed for a low monthly license fee. This is recommended if you are reselling web hosting to your clients. Please contact Sales through our Helpdesk for pricing and to add Softaculous to your server.
Once Softaculous is available on your server, you can use the previous instructions to install Wordpress on your website.
