Difference between revisions of "Moving your Wordpress blog"
Docs admin (talk | contribs) |
Docs admin (talk | contribs) |
||
| (2 intermediate revisions by the same user not shown) | |||
| Line 1: | Line 1: | ||
| − | Moving a Wordpress blog is an easy process. You first download all your data into | + | Moving a Wordpress blog is an easy process. You first download all of your data into an export XML file, then import that file into the new WordPress installation. |
| Line 5: | Line 5: | ||
| − | Log | + | Log in to your existing Wordpress admin area. Go to Tools and select Export. |
[[File:wp1.png]] | [[File:wp1.png]] | ||
| Line 19: | Line 19: | ||
| − | Acenet recommends using a fresh Wordpress installation, using the latest version available. You can install Wordpress by logging | + | Acenet recommends using a fresh Wordpress installation, using the latest version available. You can install Wordpress by logging in to your cPanel, and selecting Software -> Softaculous Apps Installer. When you get to the page where you can customize your install information, Go to Advanced Options. Set Auto Upgrade to Any Latest version available, then check the Auto Upgrade Wordpress Plugins and the Auto Upgrade Wordpress Plugins check boxes. This will help with security by automatically updating the site software. |
[[File:wp6.png]] | [[File:wp6.png]] | ||
Latest revision as of 11:47, 28 October 2019
Moving a Wordpress blog is an easy process. You first download all of your data into an export XML file, then import that file into the new WordPress installation.
Export existing Wordpress Installation
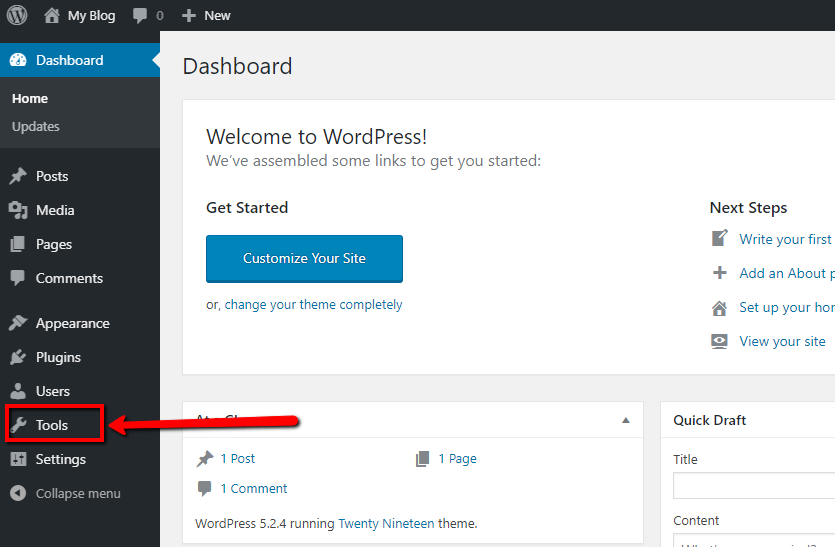
Log in to your existing Wordpress admin area. Go to Tools and select Export.
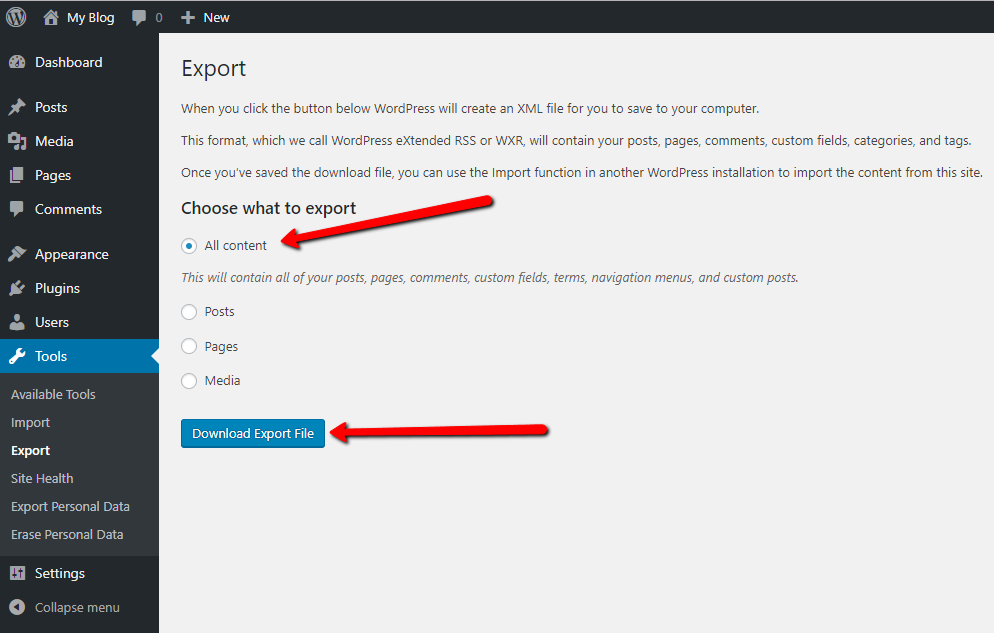
Choose "All Content", and then click the blue "Download Export File" button.
Create New Wordpress Installation
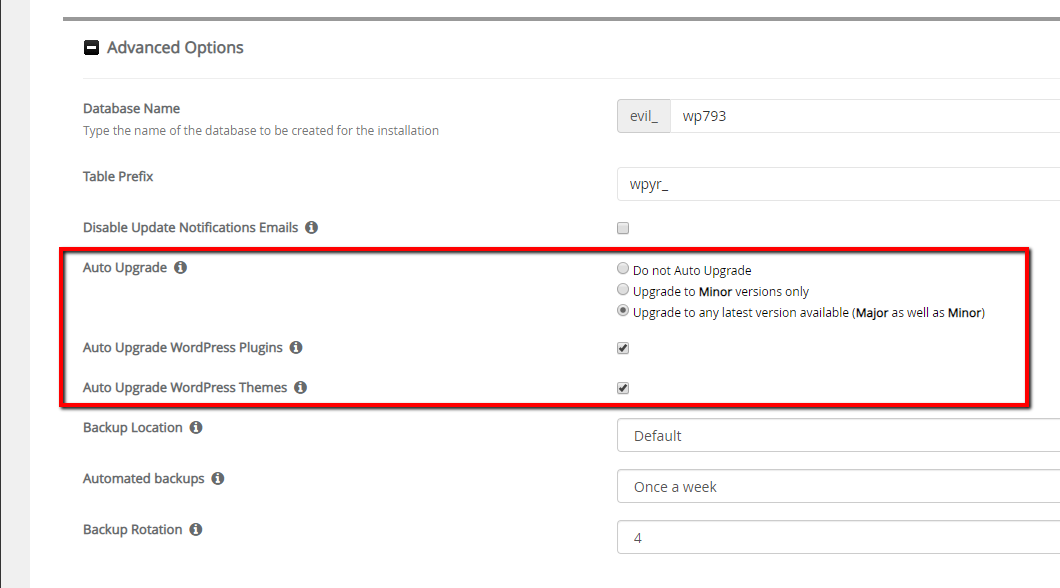
Acenet recommends using a fresh Wordpress installation, using the latest version available. You can install Wordpress by logging in to your cPanel, and selecting Software -> Softaculous Apps Installer. When you get to the page where you can customize your install information, Go to Advanced Options. Set Auto Upgrade to Any Latest version available, then check the Auto Upgrade Wordpress Plugins and the Auto Upgrade Wordpress Plugins check boxes. This will help with security by automatically updating the site software.
Import Wordpress XML File
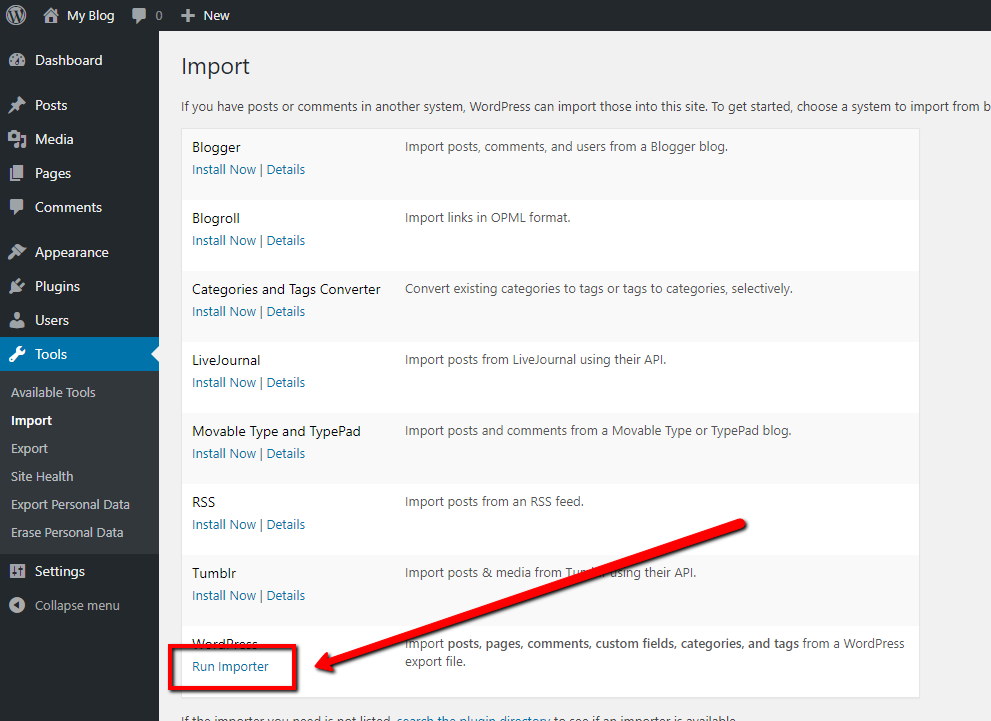
On the new Installation, go to Tools -> Import. Go down the list to Wordpress, and if it shows Install Now, click that link. If it does not, choose Run Now.
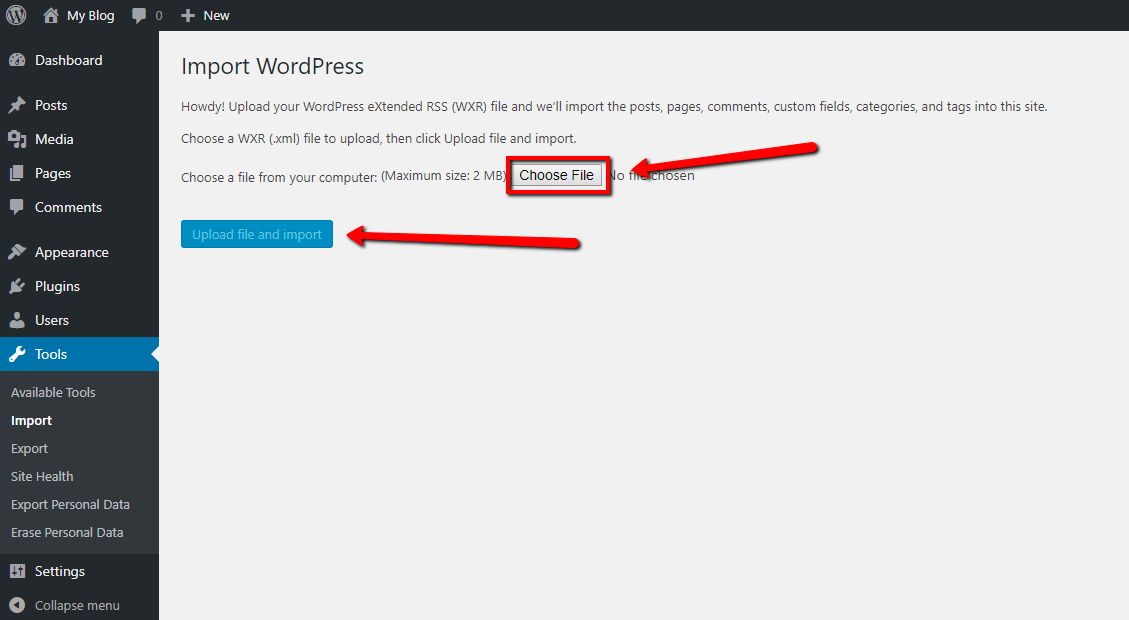
Click on Choose a Fie, and select the Export file created from the existing installation. Click the blue "Upload File and Import" button.
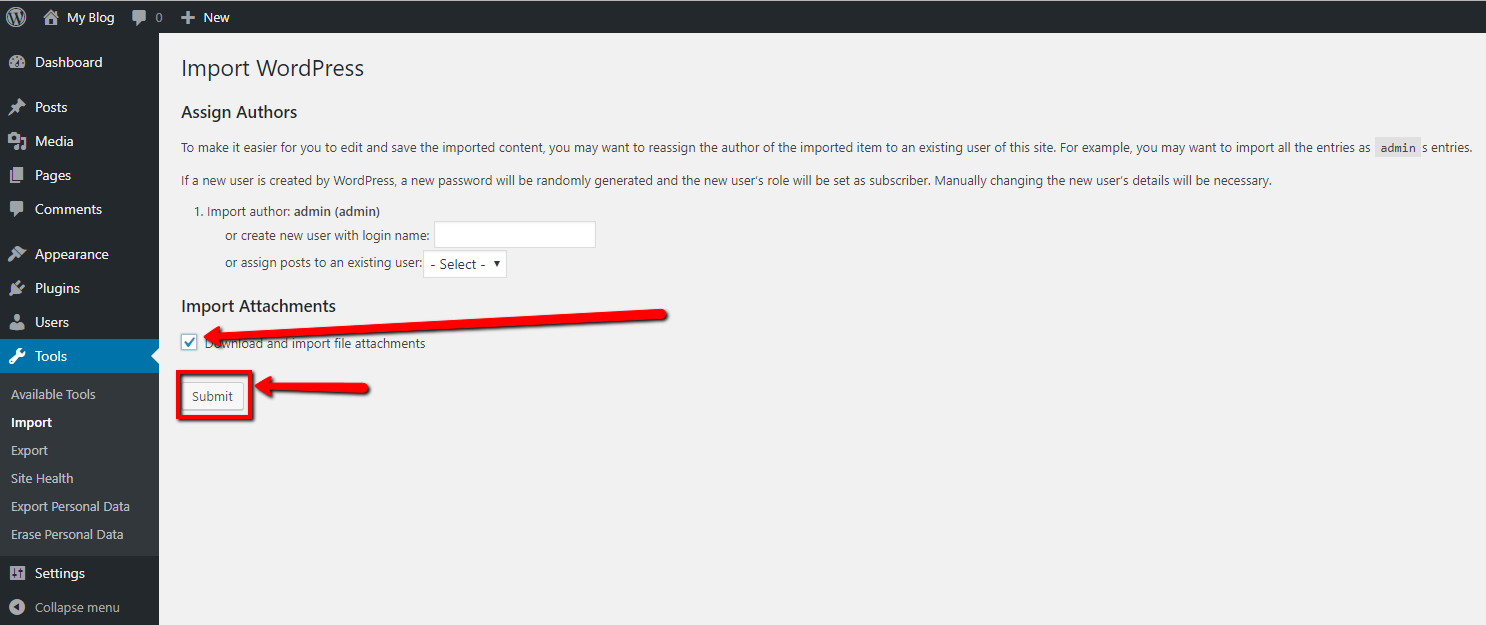
On the next page, you have the option of setting the author name on the content to be imported, and have a user edit it. You can change it to a user, or leave it as admin. Make sure to click the Download and import file attachments check box, then click Submit.
The next page should say something like "All done. Have fun! Remember to update the passwords and roles of imported users.". If you see that, you should be all set.
