Node.js: Difference between revisions
Docs admin (talk | contribs) No edit summary |
Docs admin (talk | contribs) No edit summary |
||
| (10 intermediate revisions by the same user not shown) | |||
| Line 1: | Line 1: | ||
Node.js applications are easy to install in cPanel on Acenet's Shared and Reseller servers, thanks to CloudLinux Node.js Selector. | Node.js applications are easy to install in cPanel on Acenet's Shared and Reseller servers, thanks to the CloudLinux Node.js Selector. | ||
Log into cPanel, and go to the Software section. | *Log into cPanel, and go to the Software section. | ||
Click the "Setup Node.js App" Icon. | *Click the "Setup Node.js App" Icon. | ||
[[File:cpanelnodejs.png]] | [[File:cpanelnodejs.png]] | ||
*On the next screen, any currently installed Node.js apps will be listed. Click the blue "Create Application" Button in the upper right to add a new application. | |||
[[File:cpanelnodejs1.png|1000px]] | |||
<br><br> | |||
*There are several options and dialog boxes on the Create screen. | |||
<br> | |||
[[File:cpanelnodejs2.png|1000px]] | |||
<br><br> | |||
1) Select the Node.js version you wish to use from the dropdown.<br><br> | |||
2) Select the Application node: Development or Production<br><br> | |||
3) Enter the application root directory. It should be something like "/home/CPANEUSERNAME/directory". with your cPanel username and the name of the directory for your application files.<br><br> | |||
4) Edit the Application URL wil be the domain name the app will be on, plus a subdomain name which is redirected to the app.<br><br> | |||
5) Enter the name of the Application startup file. This will be accessed when the application is started or restarted.<br><br> | |||
6) Any Environmental Variables can be entered by clicking Add Variable, then entering the variable name and value, and clicking done.<br><br> | |||
Click the blue Create button in the upper right when done. Application files should then be uploaded to the application root directory, which was created in step 3. <br><br> | |||
Latest revision as of 08:12, 28 August 2018
Node.js applications are easy to install in cPanel on Acenet's Shared and Reseller servers, thanks to the CloudLinux Node.js Selector.
- Log into cPanel, and go to the Software section.
- Click the "Setup Node.js App" Icon.
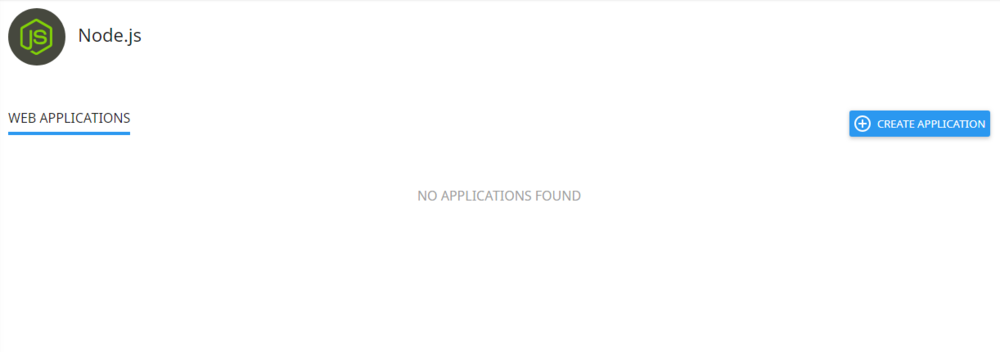
- On the next screen, any currently installed Node.js apps will be listed. Click the blue "Create Application" Button in the upper right to add a new application.
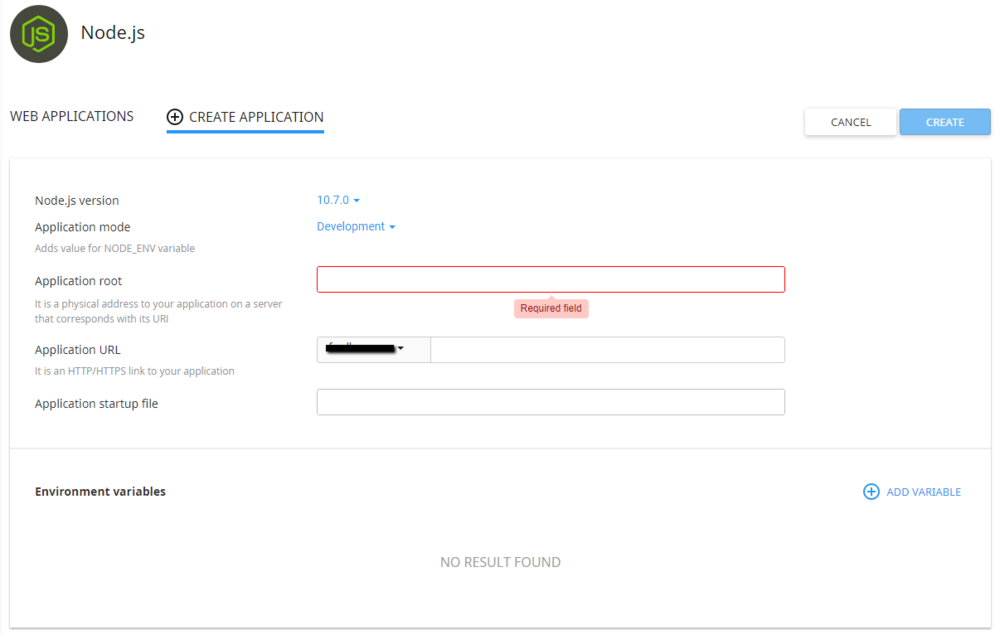
- There are several options and dialog boxes on the Create screen.

1) Select the Node.js version you wish to use from the dropdown.
2) Select the Application node: Development or Production
3) Enter the application root directory. It should be something like "/home/CPANEUSERNAME/directory". with your cPanel username and the name of the directory for your application files.
4) Edit the Application URL wil be the domain name the app will be on, plus a subdomain name which is redirected to the app.
5) Enter the name of the Application startup file. This will be accessed when the application is started or restarted.
6) Any Environmental Variables can be entered by clicking Add Variable, then entering the variable name and value, and clicking done.
Click the blue Create button in the upper right when done. Application files should then be uploaded to the application root directory, which was created in step 3.

