Difference between revisions of "How to enable Email Authentication"
Docs admin (Talk | contribs) (→To Enable SPF Records) |
Docs admin (Talk | contribs) |
||
| Line 15: | Line 15: | ||
5) Verify that the Status now says that it is Active and Enabled | 5) Verify that the Status now says that it is Active and Enabled | ||
| + | |||
| + | [[File:Dkim.png]] | ||
==To Enable SPF Records== | ==To Enable SPF Records== | ||
| Line 26: | Line 28: | ||
5) Verify that the Status now says that it is Active and Enabled | 5) Verify that the Status now says that it is Active and Enabled | ||
| + | |||
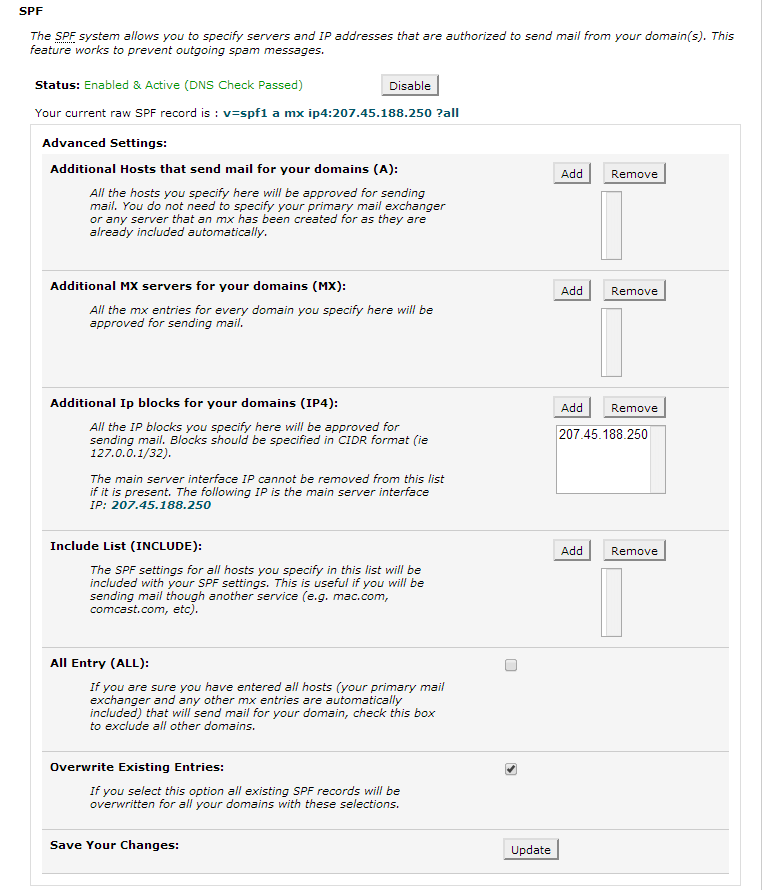
| + | [[File:Spf.png]] | ||
Revision as of 13:55, 13 April 2014
There are several methods to help control SPAM through email and DNS. The easiest is enabling SPF and DKIM records in cPanel. DKIM and SPF records are enabled by default for all new accounts, but you will want to double check to make sure the information is accurate.
GMail, Hotmail, Yahoo, and AOL all use a combination of SPF, DKIM, and other methods to help validate the sender of a particular mail message. Enabling these methods wil help validate the sender and will help your mail be delivered successfully.
If you are using third party MX records or an outside mail server, you may need to open a support ticket with our Help Desk to enable SPF Records. Enabling within cPanel can break your mail if it is not first setup with your external mail server.
To Enable Domain Keys
1) Log into cPanel
2) Click Email Authentication
3) Click ENABLE beside the Domain Keys section
4) Click the Go Back link
5) Verify that the Status now says that it is Active and Enabled
To Enable SPF Records
1) Log into cPanel
2) Click Email Authentication
3) Click ENABLE beside the SPF section
4) Click the Go Back link
5) Verify that the Status now says that it is Active and Enabled

