Difference between revisions of "Routing Mail to SpamExperts"
Docs admin (talk | contribs) |
Docs admin (talk | contribs) |
||
| (12 intermediate revisions by the same user not shown) | |||
| Line 6: | Line 6: | ||
=Specify Domain(s) to filter= | =Specify Domain(s) to filter= | ||
| − | {{tip|Before proceeding, you will want to make sure that you have received the Welcome email that gets | + | {{tip|Before proceeding, you will want to make sure that you have received the Welcome email that gets sent out automatically to your primary contact email address.}} |
1) Log into your {{Client Area}} | 1) Log into your {{Client Area}} | ||
| Line 24: | Line 24: | ||
4) On the next page, click the Login to Panel button at the bottom. You will be automatically logged into the SpamExperts panel. | 4) On the next page, click the Login to Panel button at the bottom. You will be automatically logged into the SpamExperts panel. | ||
| − | [[File:logintopanel.png]] | + | [[File:logintopanel.png|800px]] |
5) Within the SpamExperts panel, under Domains, click Add Domain | 5) Within the SpamExperts panel, under Domains, click Add Domain | ||
| − | [[File:adddomain.png]] | + | [[File:adddomain.png|800px]] |
6) Enter your domain name, and click Continue. This will add the domain to the spam filter. | 6) Enter your domain name, and click Continue. This will add the domain to the spam filter. | ||
| − | [[File:continue.png]] | + | [[File:continue.png|800px]] |
| Line 48: | Line 48: | ||
[[File:Zone.png|1000px]] | [[File:Zone.png|1000px]] | ||
| − | + | <br><br> | |
2) On the Zone Editor page, scroll down to the domain name you want to set up SpamExperts on, and click on Manage to the far right on that line | 2) On the Zone Editor page, scroll down to the domain name you want to set up SpamExperts on, and click on Manage to the far right on that line | ||
[[File:Zone2.png|1000px]] | [[File:Zone2.png|1000px]] | ||
| + | |||
| + | <br><br> | ||
3) Just under the domain filter dialog box, click on the MX Link. | 3) Just under the domain filter dialog box, click on the MX Link. | ||
| − | |||
[[File:Zone3.png|1000px]] | [[File:Zone3.png|1000px]] | ||
| + | <br><br> | ||
4) Scroll down until you see the existing MX records. Delete any existing MX entries. | 4) Scroll down until you see the existing MX records. Delete any existing MX entries. | ||
| Line 64: | Line 66: | ||
[[File:Zone4.png|1000px]] | [[File:Zone4.png|1000px]] | ||
| + | <br><br> | ||
| − | 5) Near the top of the zone editor, click on the Add Record button, and select Add MX Record. | + | 5) Near the top of the zone editor, click on the dropdown next to the Add Record button, and select Add MX Record. |
[[File:Zone5.png|1000px]] | [[File:Zone5.png|1000px]] | ||
| − | + | <br><br> | |
| − | + | 6) Add the following information to the entry, then click Add Record. | |
| − | |||
| − | |||
| + | <b>Priority:</b> 10<br> | ||
| + | <b>Destination:</b> mx.spamexperts.com<br> | ||
| + | <br> | ||
[[File:Zone6.png|1000px]] | [[File:Zone6.png|1000px]] | ||
| + | |||
| + | <br> | ||
| + | 6) Repeat Steps 5 and 6 for the following MX records. There will be three MX records when complete. | ||
| + | <br> | ||
| + | <b>Priority:</b> 20<br> | ||
| + | <b>Destination:</b> fallbackmx.spamexperts.eu<br> | ||
| + | <br> | ||
| + | <b>Priority:</b> 30 <br> | ||
| + | <b>Destination:</b> lastmx.spamexperts.net<br> | ||
| + | <br> | ||
| + | |||
| + | 7) At this point, Mail for this domain will now be filtered by SpamExperts. | ||
| + | |||
| + | <br><br><br> | ||
===For Servers without cPanel=== | ===For Servers without cPanel=== | ||
Latest revision as of 12:08, 16 May 2018
SpamExperts allows you to add any domain under your account to the SpamExperts email filtering cluster. You can set up filtering on your main domain, or on any addon domain you wish using these instructions. You will need to specify the domain to filter, and then route mail to the SpamExperts cluster.
If you have ordered a SpamExperts 10 pack, you can specify the domains to filter using the exact same instructions, just Bind the additional domains.
Specify Domain(s) to filter
1) Log into your Client Area
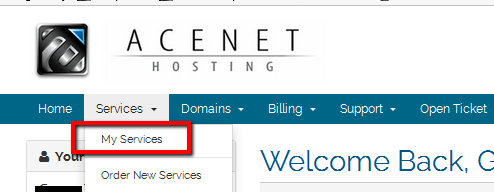
2) Go to Services -> My Services.
3) Under My Services, find the SpamExperts item, mouse over it to highlight it, and click
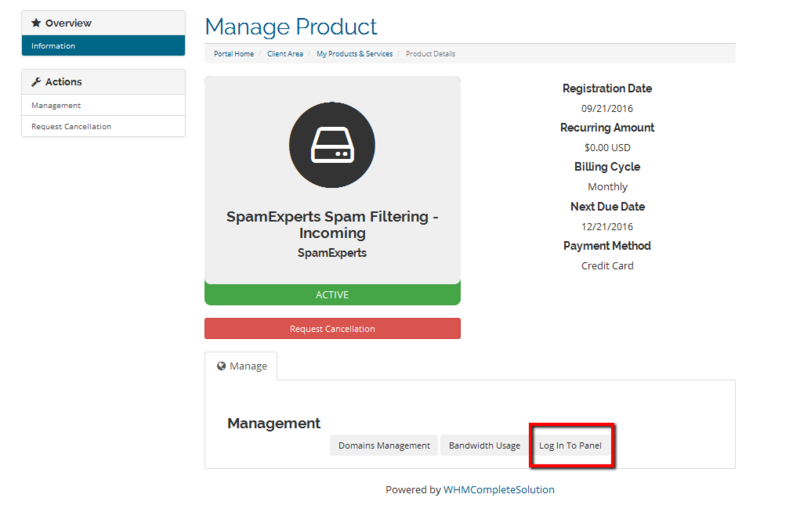
4) On the next page, click the Login to Panel button at the bottom. You will be automatically logged into the SpamExperts panel.
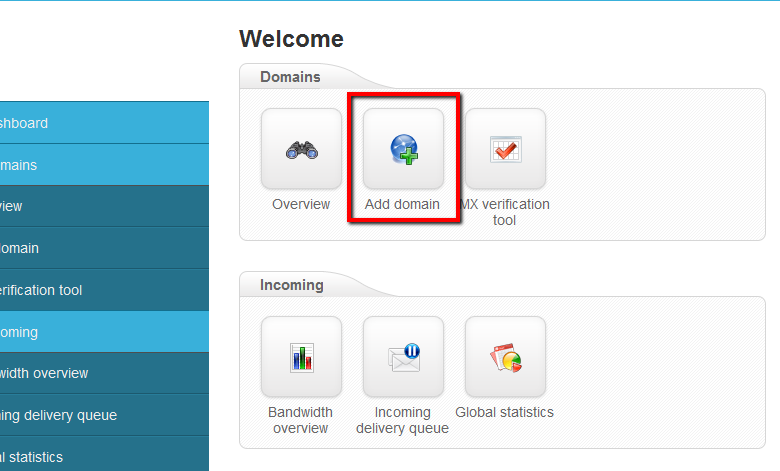
5) Within the SpamExperts panel, under Domains, click Add Domain
6) Enter your domain name, and click Continue. This will add the domain to the spam filter.
Once this is done, you will need to Route Mail to the SpamExperts cluster
Route Mail to SpamExperts Mail Servers
For Servers with cPanel
1) Log into cPanel, and go to Domains -> Zone Editor
2) On the Zone Editor page, scroll down to the domain name you want to set up SpamExperts on, and click on Manage to the far right on that line
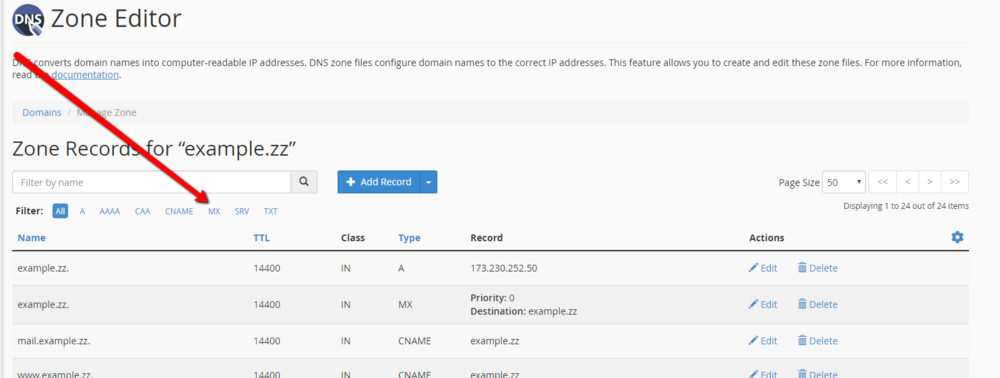
3) Just under the domain filter dialog box, click on the MX Link.
4) Scroll down until you see the existing MX records. Delete any existing MX entries.
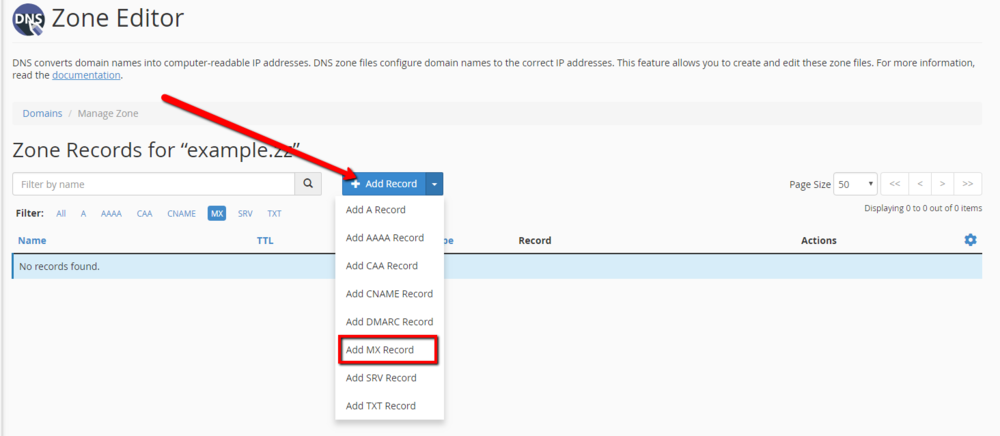
5) Near the top of the zone editor, click on the dropdown next to the Add Record button, and select Add MX Record.
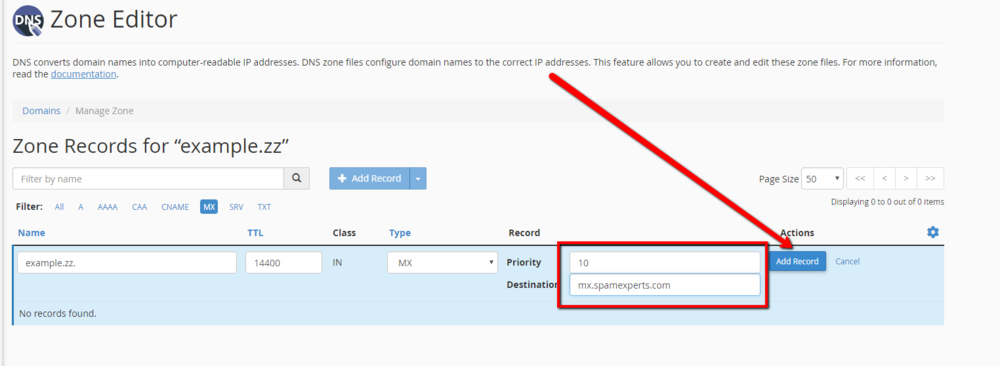
6) Add the following information to the entry, then click Add Record.
Priority: 10
Destination: mx.spamexperts.com
6) Repeat Steps 5 and 6 for the following MX records. There will be three MX records when complete.
Priority: 20
Destination: fallbackmx.spamexperts.eu
Priority: 30
Destination: lastmx.spamexperts.net
7) At this point, Mail for this domain will now be filtered by SpamExperts.
For Servers without cPanel
If the original MX record is pointing to one of our servers, you will only need to manually edit your DNS Zone and use just the three MX records above. SpamExperts will deliver all of the filtered mail to the server your original MX record was pointing to.
